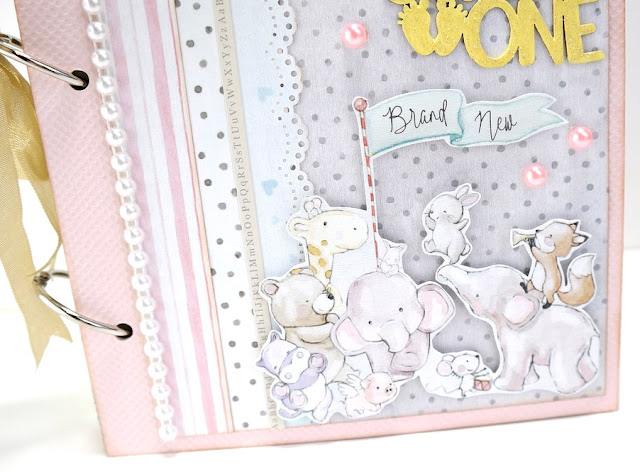
Hi! I'm sharing the last project I created with the Hello, I'm New collection from FabScraps today. I really love creating mini albums. This design features monthly tabbed pages and blank calendar pockets to record all those important milestones and to tuck away keepsakes. There is plenty of room to add journaling and photos in this design. My baby albums are already complete, so I'll have to save this to give to my next expectant friend.
Supplies:
Hello, I'm New Bundle of Joy Patterned Paper (C107 001)
Hello, I'm New Love and Laughter Patterned Paper (C107 002)
Hello, I'm New Wish Upon A Star Patterned Paper (C107 003)
Hello, I'm New Star Gazing Patterned Paper (C107 004)
Hello, I'm New Well, Hello There Patterned Paper (C107 005)
Hello, I'm New Little Blessing Patterned Paper (C107 006)
Hello, I'm New Bunny Kisses Patterned Paper (C107 007)
Hello, I'm New Isn't She Lovely Patterned Paper (C107 008)
Hello, I'm New Little Memories Clear Stickers (ST107 001)
Hello, I'm New Carder's Pack (MC107 001A)
Hello, I'm New Little One Chipboard (DC107 005)
FabScraps Blush Rough Cardstock (CC 022)
FabScraps Pink Pearls
Kraft Tag Envelopes
Seam Binding Ribbon
Yellow, Pink, and Blue Ribbon
White Pearl Ribbon
Mini Calendar Album (MelissaFrances)
Alphabet Sticker Border (Melissa Frances)
Number Stickers (Prima)
Yellow Acrylic Paint (DecoArt Americana Sunny Day)
Scalloped Border Punch (Martha Stewart)
Clear Glitter Glue
Brown Dye Ink
Crafty Foam Tape (Scrapbook Adhesives by 3L)
Directions:
1. Cut patterned papers to cover the front and back of each monthly tab, and the front and back covers, of the album. Apply brown dye ink to the edges of the patterned papers and attach to the tabbed pages. Cut 12 pink cardstock rectangles to fit onto the monthly divider tabs. Apply brown dye ink to the edges of the cardstock rectangles. Glue the cardstock rectangles onto the tabs. Add a number sticker (1 - 12) to the tabs.
2. Embellish the tabbed pages with die-cuts (Carder's Pack), tag pockets, and ribbon.
3. Add patterned paper layers to the album cover. Carefully cut a grouping of animals from the Bundle of Joy patterned paper and attach it to the front cover with Crafty Foam Tape.
4. Glue a strip of white pearl ribbon and pink half pearls to the album cover.
5. Color the Little One chipboard with yellow acrylic paint. Apply a layer of clear glitter glue to the chipboard. Glue to the top right corner of the album.
6. Tie a length of seam binding ribbon around the top binder ring of the album.
Here's a video of a flip though the album. Each tabbed page has room for photos. The calendar envelope pages are blank, so this album can be started at any month.
Pin It!


Ohhhhhhhhh this is GORGEOUS! LOVING those adorable animals!!!!!!!
ReplyDelete