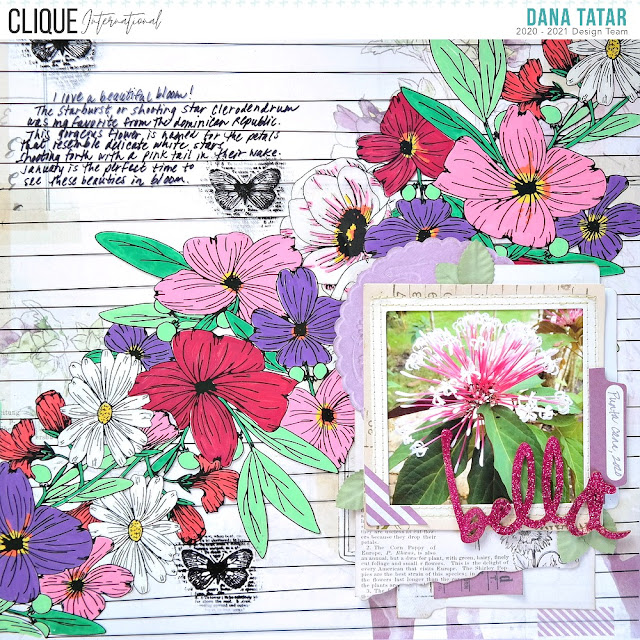
Hi! I'm sharing a tropical themed layout that I created using the
49 and Market Lilac Vintage Artistry Add-On Kit and the
Miss Mamamint Give Me Color Acetate Specialty Paper for
Clique International today. I found the specialty acetate paper while browsing in the shop and thought it would be fun to pair it with the gorgeous floral patterned paper in the 49 and Market kit. My favorite way to use acetate is as an overlay to add an additional print to my projects. Whether starting with a store bought specialty paper or my own design, it is important to use the correct mediums for a permanent finish. Today I'm sharing how to color, stamp, and write on acetate, plus how to remove any mistakes.
How to Color Acetate Specialty Paper
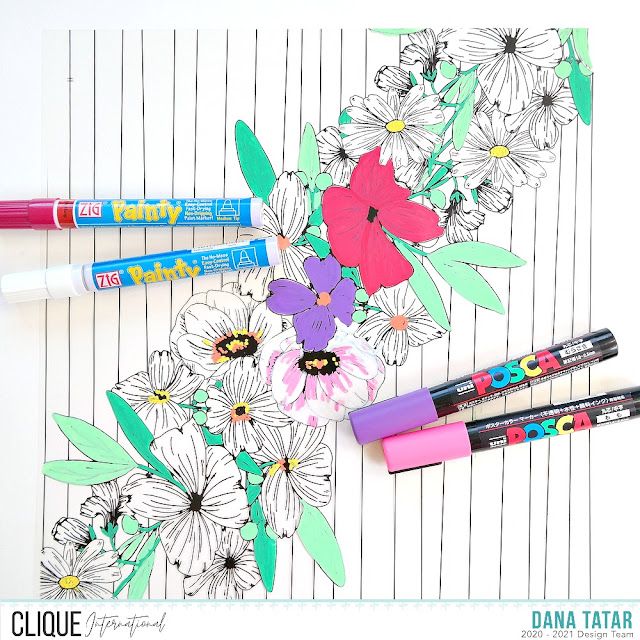
When coloring designs printed on acetate it is important to use a waterproof permanent marker or paint marker. I used both water-based (Posca) and oil-based (ZIG Painty) paint markers to color the printed design on this acetate sheet. Both formulas of paint work great on acetate. Sharpie permanent markers and Sharpie paint markers are also a great option. Use what you have in your stash! I like to add color to the inked side of the acetate rather than the smooth side to help keep the color inside the lines. The water-based paint is a bit thinner than the oil-based formula and is easier to spread and blend. The oil-based paint marker provides more coverage with one coat and a more shiny, or wet looking, finish. As shown above, both the water-based and oil-based paints give vibrant color. Both paints dried quickly without added heat. Any small imperfections can be scraped off the acetate with a fingernail or plastic scraper tool.
How to Stamp on Acetate
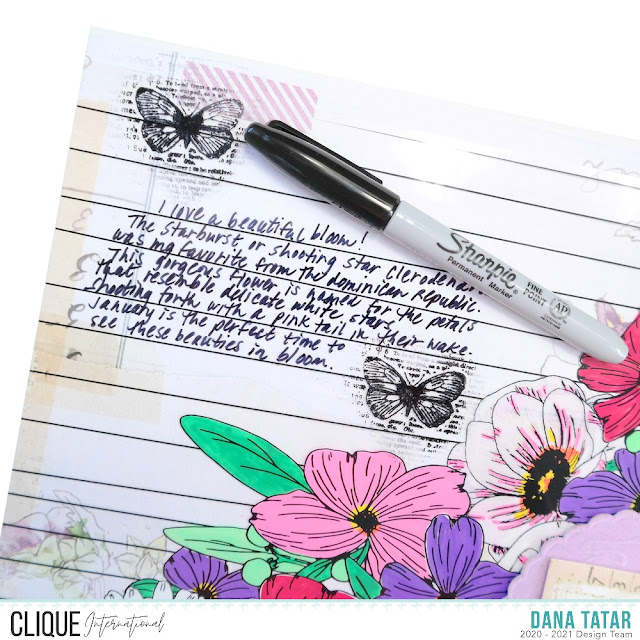
Solvent ink is oil-based and perfect for use on non-absorbent or slick surfaces. Solvent ink is also fadeproof, waterproof, and scratch resistant. I used StazOn ink to add butterflies to my layout using the
49 and Market Springtime Harmony Clear Stamp. If you like to keep your stamps clean, a stamp cleaner will be needed to remove the solvent ink from the stamp. Soap and water will not work.
How to Write on Acetate
Sharpie permanent markers are a great choice for writing on slick surfaces. Any permanent marker will work. I like Sharpie for the variety of colors and tip sizes and relatively low cost. Paint markers similar to the ones used above will also work.
How to Remove Permanent Ink from Acetate
Permanent marker and StazOn ink can be easily removed from acetate if necessary. Simply color over the undesired ink with a dry erase marker and wipe away with a tissue.
How to Attach Acetate to Projects
Adhering acetate to projects is tricky because it is transparent. I like to use clear adhesive to have my layers be as seamless as possible. I applied Adhesive Dots to each of the painted flower centers on the acetate sheet and then pressed it onto my base piece of patterned paper. I attached the acetate to the patterned paper with the painted side facing down to protect the color from being scratched. Then I used the washi tape included in the kit to secure the top left and bottom right corners of the acetate to the patterned paper.
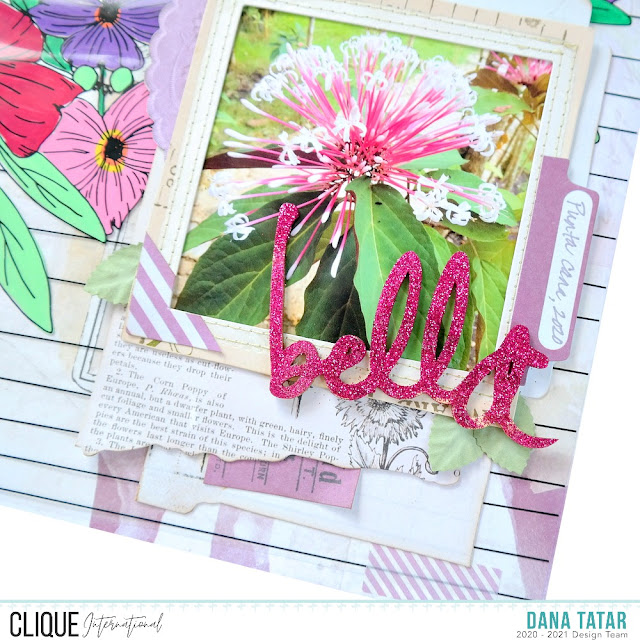
Once my colored acetate was attached to the patterned paper base I topped it with layers of ephemera, paper leaves, and my photo.
I added a glittered wood title from my stash to finish the page. I took this photo while vacationing in the Dominican Republic. The Starburst or Shooting Star Clerodendrum is named for its flowers that resemble delicate white stars shooting forth with a pink tail in their wake. Definitely bella!
Thanks so much for stopping by today! I hope I have inspired you to try incorporating acetate into your art.
Clique International Supplies:49 and Market Lilac Vintage Artistry Add-On Kit49 and Market Springtime Harmony 4x6 Clear StampMiss Mamamint Give Me Color Acetate Specialty PaperOther Supplies: Glittered Wood Veneer Word (Heidi Swapp); Leaves (49 and Market); Stitched Die-Cut Frame (49 and Market); Paint Markers (EK Success, Posca); StazOn Ink (Tsukineko); Chalk Ink (Clearsnap); Permanent Marker (Sharpie); Adhesive Dots (Scrapbook Adhesives by 3L)
Pin It!


Love love love love this! LOVING those flowers!! The colors are gorgeous!
ReplyDeleteThanks so much Julie!
ReplyDelete