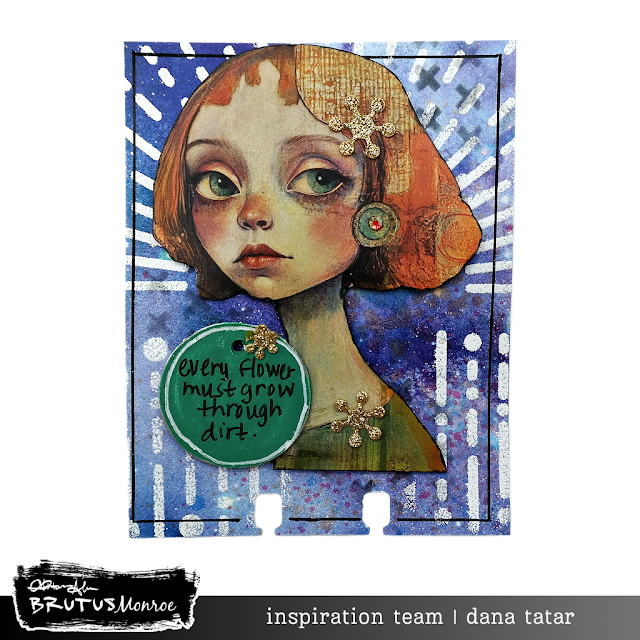
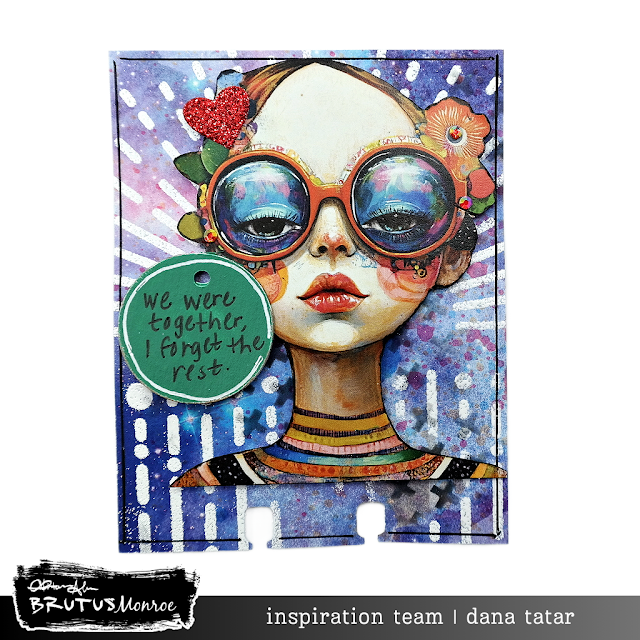
Hi! I made this MemoryDex Box by hand and then filled it with mixed media art created with the Rainbow Portraits Creative Cards for Brutus Monroe. The backgrounds were crafted by applying stenciled designs and Chroma Mist onto patterned paper. Each card features a lovely lady from the Rainbow Portraits Creative Cards set, a painted chipboard quote tag, and sparkly embellishments. These cards just might be my favorite Brutus Monroe product to date!
I created 8 cards for this box, but it can definitely hold more. I decorated the top edge with Doodle Art Washi Sheets that I colored by hand. I die-cut a Lace Layer border from blue cardstock and placed that under the washi and then added flat back crystals.
I cut my cards to measure 3.5 inches wide by 4.5 inches tall from a piece of Watercolor Galaxy patterned paper and then added more color using Ladybug, Marigold, and Bluebell Chroma Mist. I applied white pigment ink over the Starlight Mixed Media Stencil and then heat embossed with Alabaster Embossing Powder over the stenciled ink. The white-on-white ink and embossing powder combination yields a brilliant white finish that really pops off the mixed media background. To add depth to the cards, I applied black ink over the X Pattern Mixed Media Stencil randomly over the card. I finished the basic design of each card by outlining the border with a black marker.
I selected a lovely lady from the Rainbow Portraits Creative Cards for each card. I fussy cut the girls from the creative cards and attached them to the card bases with 3D foam squares for dimension. Next, I painted a chipboard tag with acrylic paint and added a handwritten quote to each. I finished embellishing the cards with die-cut glitter stock shapes and flat back crystals.
Which card is your favorite?
The February release products are available now! Shop the Brutus Monroe store and use my AFFILIATE LINK or the Coupon Code THEYCALLMETATARSALAD to save 10%.
MemoryDex Box Tutorial
There has been some interest in how I assemble the boxes to hold my cards, so I'm sharing a quick photo tutorial. Please don't hesitate to ask for clarification in the comments section.
Step 1. Select a box for this project. My box measures 4 3/8 x 4 3/4 x 2 1/4 inches. If you'd like to pick up the same box I used, which is a fabulous bright yellow, you can purchase the Penzey's Joy of Cinnamon Mini Gift Box. No matter what box you choose the instructions will be the same. Cut the lid from the box. Cut the lid closure tab away and discard. Cut the top side of the lid in half, creating two equally sized cardboard pieces. Trim the lid pieces to fit inside the box, which is about 1/4 inch from both sides and the top. I'll be inserting these pieces over the brown sides on the left and right sides of the box shown above so all of the inner sides of the box will be a sunny bright yellow.
Step 2. Create a template for the wood support dowels using a piece of cardstock. I cut my cards to measure 3.5 inches wide by 4.5 inches tall, so the piece of black cardstock shown above is cut to the same dimensions. Two wood dowels are needed to create a track that the finished cards will slide on. Align the card template in the center of the cardboard edge piece, about 1/4 inch up from the bottom edge of the cardboard. Use a hole punch to punch two holes into the cardboard. Repeat this process for the second cardboard edge piece. NOTE: The MemoryDex punch I use cuts 1/4-inch holes, so the hole punch and wood dowel I used for this box also measure 1/4 inch. I used a MemoryDex punch along the bottom edge of my cards and am using those punched holes to align the dowels in my box. If you don't have a MemoryDex card punch or cutting die, a standard hole punch and scissors can be used to create the holes along the bottom edge of each card.
Step 3. Cut two pieces of wood dowel to the length of the box and insert each end into the punched cardboard edge pieces.
Step 4. Apply adhesive to the outside edges of the wood dowel assembly and insert it into the box.
Here's what the card template looks like on the track. The space we allotted along the bottom of the card in Step 2 is important so that the finished cards are able to slide without hitting the bottom of the box.
BRU7879 Rainbow Portraits Creative Cards
BRU2900-2 Doodle Art Washi Sheet
BRU6487 Lace Layers Cutting Dies
BRU4408 Valentine Tags Chipboard
BRU8142 Watercolor Galaxy 6x6 Paper Pad
BRU1954 Ladybug Chroma Mist
BRU6599 Marigold Chroma Mist
BRU7300 Bluebell Chroma Mist
BRU0104 Starlight Mixed Media Stencil
BRU8750 X Pattern Mixed Media Stencil
BRU4122 Scattered Hearts Cutting Dies
BRU6006 Playful Petals Cutting Dies
BRU2524 Alabaster White Pigment Ink
BRU2470 Alabaster Embossing Powder
8.5x11 Gold Glitter Sticky Sheet
8.5x11 Scarlet Easy Cut Ultra Fine Glitter Paper
BRU4515 White Gesso
BRU0624 Valentine Bundle Fluid Acrylic Paint
BRU2345 Red Shift Flat Back Crystals
BRU0060 Topaz Flat Back Crystals
BRU4247 Violet Shift Flat Back Crystals
BRU6588 Light Pink Flat Back Crystals
Pin It!


Comments
Post a Comment