I love the end of summer. The weather begins to cool down, I get back into a more organized routine and my daughters get to return to school and reunite with the friends they missed over the summer vacation.
This year is extra special because my oldest daughter will start Kindergarten! I do not know who is more excited, her or me. As I was checking off each item on my daughter's school supply list, I also picked up the Moxxie School Zone Collection. The patterned papers are full of fun designs like pencils, crayons, rulers and calculators, and the fresh, bold color palette really captures the joy and excitement of school.
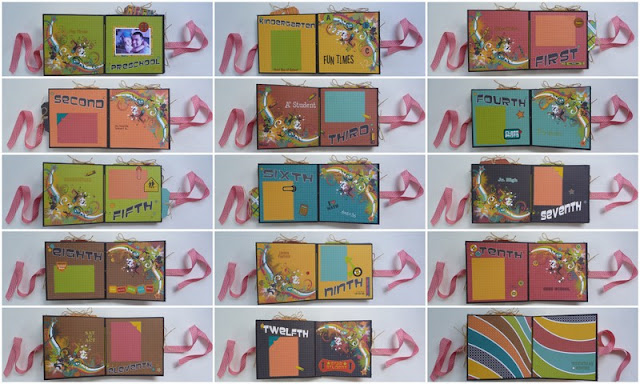
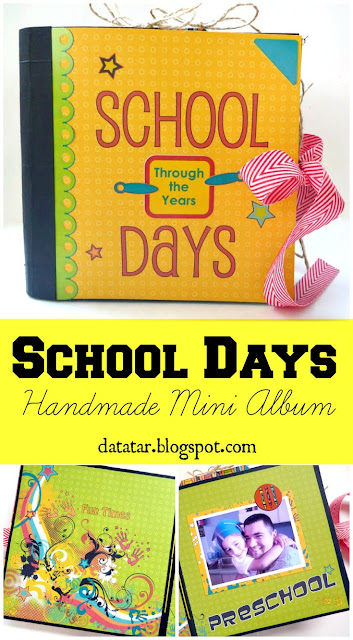
I had a blast creating this School Days Mini Album. This album has two pages for every school year from Preschool to 12th Grade and an extra two pages for extracurricular activities. Each page of the album has a pocket that can hold school photos, awards, report cards and other souvenirs collected from each school year. I added a photo mat for each grade and used the coordinating stickers and rub-ons to embellish each page of the album.
Each school grade has a designated patterned paper in the collection that features a fabulous corner flourish design and the name of the school year. I used that portion of each patterned paper for my album pages. I used the other half of each page to cut photo mats and cover shipping tags.
If you would like to make an album like this, here is what you need to do:
Step 1: Cut a piece of 12x12 cardstock in half. Take one piece of 6x12 cardstock and score every 3/4 inch. Fold the paper back and forth on the score lines to create an accordion fold. This piece of cardstock will be the mini album binding. Reserve the other half of the paper for use in Step Four.
Step 2: Cut eight pieces of 12x12 cardstock in half. Place two 6x12 pieces of cardstock together and fold in half, creating a 6x6 square. Repeat for the remaining seven groups of 6x12 pieces of cardstock. Using a sewing machine, stitch four of the grouped 6x12 pieces of cardstock along the top and bottom, creating pockets that open from the side of the page. Stitch the remaining four grouped 6x12 pieces of cardstock along the bottom and two sides, creating pockets that open from the top of the page. Note: I decided to make both top pockets and side pockets to keep my album balanced as items are placed into the pockets over the years.
Step 3: To attach the pages into the accordion folds of the binding, place the folded edge of the page against the matching fold of the accordion panel. Pierce three holes through the two fold lines simultaneously at 1-inch, 3-inches and 5-inches (measuring from the top of the page). To secure the pages in place, use a pamphlet stitch. Using embroidery floss and a needle, bring the needle from the outside of the fold and through the center hole, leaving a 3-inch tail on the outside of the binding. Carry the floss along inside the fold and out through the top hole. Carry the floss along the entire length of the accordion binding on the outside of the book, creating a long stitch, and then thread the needle through the bottom hole to the inside of the fold. Bring the needle out through the middle hole. Your starting thread and ending thread should be on opposite sides of the long stitch on the outside of the binding. Tie the ends of the floss in a square knot, making sure to tie the knot around the long stitch. Repeat the pamphlet stitch to secure the other seven pages into the accordion binding. Note: I arranged my album pages so that every other page had a top pocket opening.
Step Four: Take the piece of 6x12 cardstock leftover from Step 1 and score every 3/4 of an inch. Fold the paper back and forth on the score lines to create an accordion fold. Cut a strip 2 1/2 inches from one end. This piece of cardstock will cover the stitching that holds the album together. Glue the piece of cardstock to the front and back flaps of the binding.
Step Five: Cut two, 16-inch pieces if ribbon. Glue one end of a piece of ribbon to the center of the front page of the album. Flip the album over and glue one end of the second piece of ribbon to the center of the back page of the album. Cut a piece of patterned paper to 6x6 inches. Add the piece of patterned paper to the front of the album, under the flap of the album binding. This piece of paper covers the ribbon and makes the front cover of the album. Repeat for the back cover of the album.
Step Six: Glue the flap from the binding down on the front cover. Repeat for the back cover.
Step Seven: Add a border sticker along the edge of the binding down the front cover of the album. Repeat for the back cover.
Step Eight: Glue down the tabs from the accordion binding, found on every other page of the album, to the album page beneath it to give the album stability. Cut patterned papers to 5 3/4 inches square and add them to each page of the album.
Step Nine: Embellish the front cover and inside pages of the album with stickers and rub-ons. Add 4x3 inch photo mats every other page of the album. Optional: Using leftover pieces of patterned paper from the collection, cover several shipping tags. Randomly insert the tags into the pockets of the album pages.


Thank you for that tutorial! I am so going to do this. LOVE the school album, too!!!! Love the graphics and all that color.
ReplyDeleteWoWza - thank you for this tutorial.. it's fabulous and I must have a go at one of these :-) xxx
ReplyDelete