 |
| Ink, stamp, and tools provided by Clearsnap. Scissors provided by Westcott. Tape provided by Scrapbook Adhesives by 3L. |
Hi friends! I'm super excited to be a part of the Clearsnap + CardMaker Magazine Blog Hop! Thanks so much for stopping by today! If you've arrived here from Dawn's blog you're in the right place. If you're visiting my blog for another reason today and would like to be inspired and have a chance to win a fantastic prize package, you can start the hop from the beginning by visiting the CardMaker Magazine Blog.
It’s moving season. Many of my neighbors have moved, are in the process of closing on a new home, or are preparing their house for an upcoming move. As a military wife, I'm used to saying goodbye. This time around, many of my good friends are leaving the area before me. It's always hard to be the last to leave, but I'm also excited for the families that are moving into this great area. I thought it would be fun to make some housewarming cards.
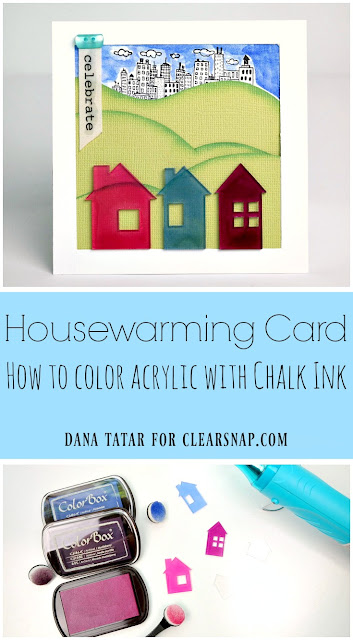
I love using chalk ink because of the versatility of the ink. It has a fantastic dense luster, it is fast-drying, blendable, and ideal for a variety of fun surfaces. I used chalk ink on watercolor paper, cardstock, and acrylic to create this celebratory card.
Supplies:
- ColorBox® Chalk Ink: Blackbird, Chive, Dahlia, Huckleberry, Periwinkle
- Clearsnap 3-inch Wood Mount Stamp: CityScape
- ColorBox® Stylus and Circle Tips
- ColorBox Art Dauber
- 4.5 x 4.5 inch Watercolor Card Base, 4.5 x 4.5 inch Watercolor Square
- 4-inch Square Die
- Acrylic Houses
- Green Cardstock
- Fabric Ribbon
- Button
- "Celebrate" Clear Sticker
- Die-cut Machine
- Scissors
- Stencils (optional)
- Paintbrush
- Acrylic Block (or other slick surface)
- Water
- Adhesive
- Heat Gun
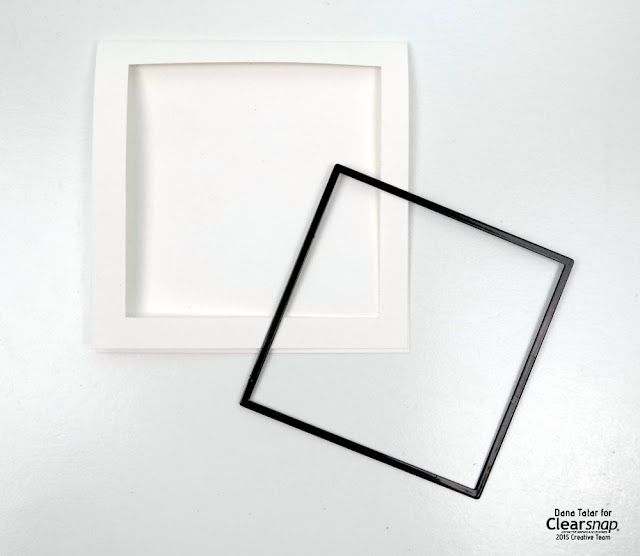
Step One: Fold and trim a piece of watercolor paper to 4.5 x 4.5 inches. Use a 4-inch square die to cut a window in the center of the top of the card.
Step Two: Stamp a city scene onto the top center of the die-cut square from Step One using the Clearsnap City Scape 3-inch Wood Mount Stamp and ColorBox Blackbird Chalk Ink. Heat Set the ink.
Step Three: Use decorative edge stencils, or freehand draw, a trio of rolling hills onto green cardstock. Cut out the hills and use an Art Dauber to apply ColorBox Chive Chalk Ink to the top edges of the cut cardstock. Heat set the ink.
Step Four: Layer the green cardstock and use adhesive to attach the hills to the bottom of the stamped watercolor paper from Step Two. Center and mount the scene onto a piece of 4.5 x 4.5 inch watercolor cardstock. Use scissors to trim any excess cardstock.
Step Five: Apply ColorBox Periwinkle Chalk Ink onto a stamp block or other slick surface. Use a wet paintbrush to apply color to the sky portion of the scene. Dry the ink with a heat gun.
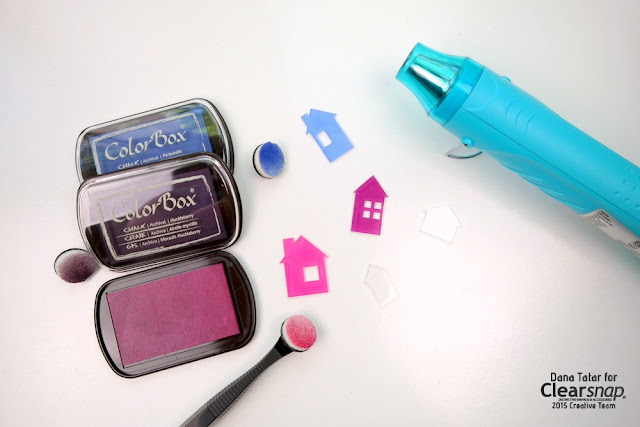
Step Six: Use a ColorBox Stylus and Foam Tips to apply ColorBox Periwinkle, Huckleberry, and Dahlia Chalk Ink to acrylic houses. Press the ink into the acrylic using a stamping motion. Dry the ink with a heat gun. Caution: The acrylic pieces will be hot! Allow the acrylic to cool before handling!
Step Seven: Adhere the city scene to the back side of the window of the 4.5 x 4.5 inch card base. Use clear glue to attach the houses along the bottom edge of the window. Place a clear sticker onto a piece of fabric ribbon and attach to the top left corner of the window. Cover the seam of the sentiment banner and window edge with a small button.
I'm ready to welcome my new neighbors! This card will pair well with a dinner, bottle of wine, or plate of baked goods. I'd love to know what you think! How do you welcome new homeowners?
Dana Tatar {You Are Here}
For more details on how to enter the prize raffle to win the above selection of ink and tools, a $50 value, please visit the Clearsnap blog.
- 71530 – Chalk Petal Point: Primary Pastels
- 71508 – Chalk PaintBox: Mercantile
- 69050 – ColorBox Stylus Handles 3-pack
- 69038 – ColorBox Stylus Tips 3-pack Oval – 2 packages


Loveeeeeeeeeeee this! LOVING that scene you created!!!!!!!!!!!!!!!!!!!!!!!!!!!
ReplyDeleteWhat a sweet idea and such an adorable card! Thanks for being a part of the hop!
ReplyDeleteDana, your work is always so bright and cheery! Love the palette and the clean design lines! Beautiful, as always!
ReplyDeleteHugz,
Chana
I love the layering on this card. Your welcome is going to be well received by your new neighbors, beautiful job.
ReplyDeleteLove the adorable scene you created! Clever!!
ReplyDeletesuch a cute card!
ReplyDeleteThis is really fun! LOVE the way the chalk looks on the plastic houses :)
ReplyDeleteThanks for the tutorial!
ReplyDeleteThank you so much for sharing, Annette
ReplyDeleteBeautiful card! I had no idea you could watercolor with chalk ink.
ReplyDeleteGreat card and great tips. Thanks for hopping with us.
ReplyDeleteI am learning all sorts of new things on the card hop today . I had never heard of heat setting chalk ink before. And as a former navy wife I certainly appreciate all ups and downs of duty station changes . Best of luck and anyone will be blessed to receive your cards.
ReplyDeleteLove your card. Thanks for the info.
ReplyDeleteLove your card. Thanks for the info.
ReplyDeleteI've never tried watercoloring with chalk inks, but love the affect! Great project!
ReplyDeleteLove the watercolor you created with the chalk. I must give this a try.
ReplyDeleteSome really clever ideas!
ReplyDeleteVery nice Dana. Great scene.
ReplyDeleteI like how you used the chalk inks to make this cute scene.
ReplyDeleteDarling card. I love the little houses.
ReplyDeleteSWEET scene and CUTE card!!!
ReplyDeleteTHANK YOU for sharing your INKY INSPIRATION Dana :)
... I love using my chalk inks, didn't know that they could be used for so many different techniques!!!
Such an adorable scene! LOVE the little houses! LOVING learning new techniques for the inks! TFS!
ReplyDeleteI love those little houses!
ReplyDeleteSuch a cool scene! Love the hills!
ReplyDeleteLovely card - love the cute little houses. Thanks for the coloring tips also - did not know you could used chalk inks with water on watercolor paper - will have to try it !!
ReplyDeleteLove that row of acrylic houses! Fun card!
ReplyDeleteGreat acrylic houses!! Really adorable scene!!
ReplyDeleteHow fun is this!!!???!!! Love the houses and the rolling hills.
ReplyDelete<3 J
jwoolbright at gmail dot com
HerPeacefulGarden.blogspot.com