Hi! I'm sharing a love themed tutorial today that uses one of my favorite techniques; turning monoprints into resin paper and using those one-of-a-kind prints for jewelry and mixed media pieces. I wanted to create something special for my daughters for Valentine's Day, and they love jewelry. I've noticed that most of the offerings in their favorite stores are poorly made and a bit uninspired. I put my craft stash to good use with this project and I think I've come up with something a little more meaningful than a store-bought necklace that they will love to wear.
Supplies:
1 - ColorBox Loved Creative Card
Clearsnap Designer Foils - Goldmine
ColorBox Archival Dye Ink by Stephanie Barnard - Cranberry, Candy, Bubblegum
Clearsnap Skinny Wood Mount Stamp - Little Love (Not Shown)
ColorBox Color Blender
Resin Monoprint (Tutorial and Supply List)
2 - Antique Gold Heart Pendants, Glass, and Chain
Adhesive Sheet
White Cardstock (Optional)
Glaze
Scissors
Marker (Not Shown)
Washi Tape (Not Shown)
Note: The supply list above does not include the supplies needed to create a resin monoprint. Please follow the link listed above for the resin monoprint tutorial and supply list.
The following tutorial can be completed in under an hour if you have a resin monoprint on hand. If not, please allow 24-36 hours to create this project.
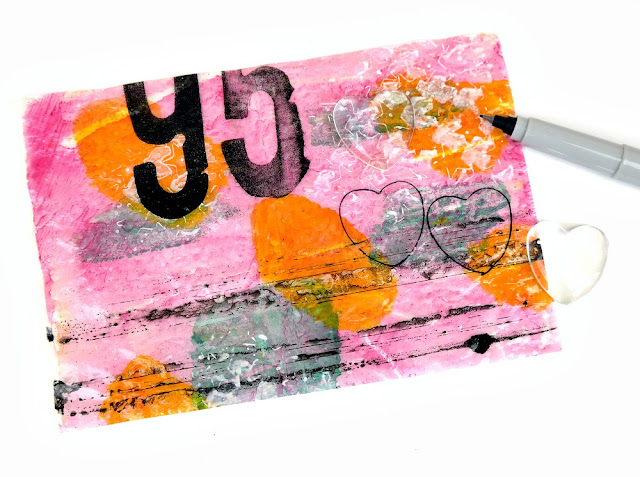
Step 1: Use a marker to trace the outline of the heart-shaped glass pendant covers onto a piece of resin paper. Optional: Also trace the outline of the heart-shaped glass pendant covers onto a piece of white cardstock. The resin paper is semi-transparent so to help the colors on the resin paper pop I backed each heart with a piece of white cardstock.
Step 2: Assemble the pendants, sealing each layer together with glaze. Let dry.
Step 3: Cut a Colorbox Loved Creative Card in half. Cut that half card in half again to create two small cards. Use a Blending Tool to apply dye ink to the cards.
Step 4: Add a foil accent to each card. Cut a strip from an adhesive sheet to fit across the bottom of each card. Peel off the top protective layer from the adhesive sheet and place the sheet adhesive side down along the bottom of each card. Rub over the adhesive sheet to stick the adhesive to the card. Peel the backing off the adhesive sheet, exposing the adhesive. Place a sheet of Designer Foil, shiny side up, on top of the adhesive strip, press to transfer the foil, and then carefully lift up. Note: Clearsnap Designer Foils will work with any adhesive.
Step 5: Stamp the word love onto the top left corner of each card.
Step 6: Lay the pendants over the cards. Gather the excess chain and secure to the back of the card with washi tape.
Pin It!


These are gorgeous! LOVING the colors!!!!!!!!!!!!!!!!
ReplyDeleteLovely pendant
ReplyDelete