Hi! I'm sharing how to wrap birthday gifts two ways today. I created this gift packaging for Scrapbook Adhesives by 3L. I was inspired by similar projects that I found on Pinterest. (Please scroll down to the bottom of this post for links to my inspiration projects.)
I love giving gifts, but my packaging doesn't always match the quality of the present inside. These gift packaging options are super festive and fun. The recipient is sure to like the outside as much as what's inside!
Birthday Cake Gift Box Tutorial
Cut two pieces of patterned paper to measure 3 inches by 11 inches. Apply 1/4" Extreme Double-Sided Tape along the right side and bottom edges of the paper pieces. Score the paper strips about 1/2 inch in from the right edge, just to the left of the tape.
Apply Micro Adhesive Dots randomly along both of the patterned paper pieces. Remove the liner on a Micro Dot and press Silver Holographic Metallic Foil over the top. Peel away the foil sheet to reveal a foiled dot. Repeat this process for the remaining adhesive dots.
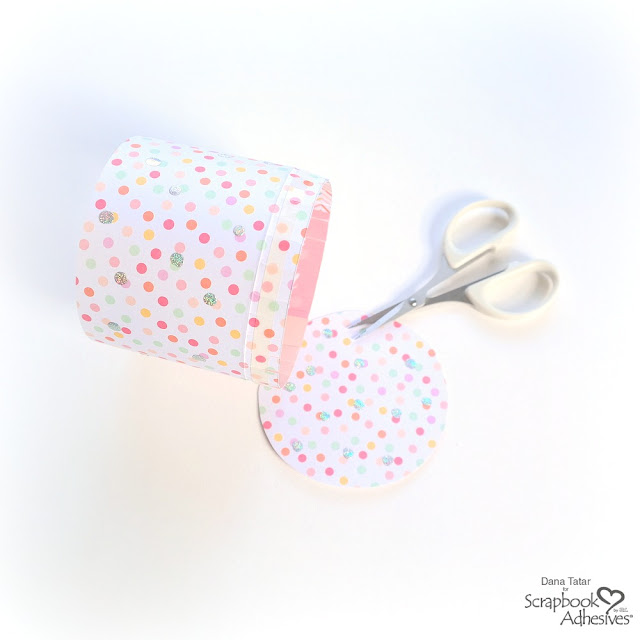
Remove the red liner from the double-sided tape along the bottom edges of the paper strips. Roll the paper strips into circles and press to seal. Be sure that one rolled circle is larger than the other so that one piece fits inside of the other.
Use the smaller paper cylinder as a guide to cut a circle about 1/2 inch larger than the cylinder from a piece of patterned paper. This circle will become the bottom of the box. Remove the red liner from the double-sided tape. Use scissors to cut small tabs from the bottom edge of the cylinder up to the score line.
Fold the tabs down along the score line. Press the cylinder onto the circle base. This is the bottom portion of the cake box.
Use the larger paper cylinder as a guide to cut a circle from patterned paper. This circle will become the top of the box. Place Micro Adhesive Dots onto the circle patterned paper and apply foil as explained in a previous step. Remove the top liner from the double-sided tape. Use scissors to cut small tabs from the bottom edge of the cylinder up to the score line. Fold the tabs down along the score line. Press the cylinder onto the circle base. This is the lid of the cake box.
The top and bottom of the birthday cake gift box are shown above. Let's make this box look like a decorated cake!
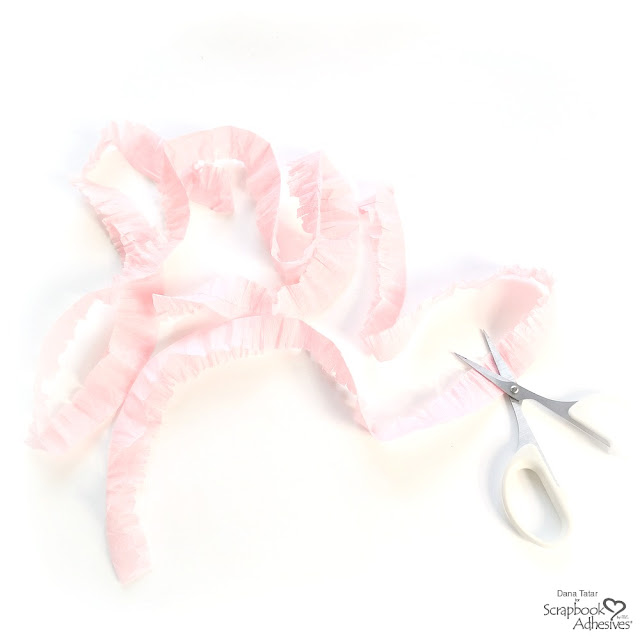
Fold a piece of crepe paper in half and cut into fringe with a pair of scissors.
Apply Crafty Power Tape along the top and bottom edges of the cake box lid. Remove the liner and press the fringed crepe paper onto the tape. Separate the layers of crepe paper and fluff with fingers.
Apply Gold Holographic Metallic Foil onto three teardrop shapes from the 3D Foam Party Shapes. These 3D Foam pieces will become the candle flames.
Cut paper straws into 3 inch segments. Peel the backing liner from the foiled 3D Foam Shapes from the previous step and press onto the top inner edge of each paper straw.
Paper straws fit perfectly inside the empty spaces of the Small 3D Foam Circles! Cut the corner from a sheet of 3D Foam Circles. Insert the candle embellishments into the empty circles, peel off the backing liner, and press onto the top of the cake box. Use 3D Foam Circles to apply flowers and leaves around the base of the candles.
Cut a festive message from patterned paper. Apply pieces of 3D Foam Strips to the back of each letter and press on to the front of the cake box.
Please stop by the Scrapbook Adhesives by 3L blog to learn more about how and why I used the adhesives I did to assemble the birthday cake gift box.
Please stop by the Scrapbook Adhesives by 3L blog to learn more about how and why I used the adhesives I did to assemble the birthday cake gift box.
Scrapbook Adhesives by 3L Supplies:
Metallic Transfer Foil Sheets Holographic ColorsAdhesive Dots Micro
3D Foam Party Shapes
3D Foam Strips
3D Foam Circles White Mix
HomeHobby by 3L Supplies:
Pin It!
Happy Birthday To You Gift Wrap
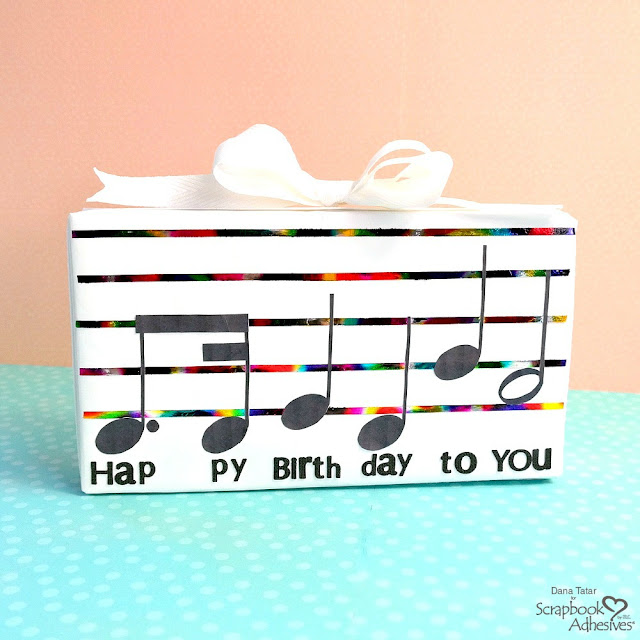
I have a confession to make. I can't sing. This Happy Birthday to You music note gift box is a great way to say happy birthday without belting out the tune. I used the song and some Holographic Metallic Foil to dress up a gift box wrapped in plain white wrapping paper.
First, enlarge "Happy Birthday" sheet music to a size that looks great on your gift box. Use scissors to cut out the music notes.
Apply 5 pieces of 1/8" Extreme Double-Sided Tape across the top of the gift box. Remove the red liner and press Holographic Metallic Foil over the top of the tape. Lift off the foil sheet to reveal the holographic music staff.
Next, use a Dual Tip Glue Pen to adhere the music notes onto the music staff on the top of the gift box.
Finally, apply letter stickers under the music notes to spell out the lyrics to "Happy Birthday."
Scrapbook Adhesives by 3L Supplies:
Metallic Transfer Foil Sheets Holographic Colors
Crafty Power Tape Dispenser 20'
Adhesive Dots Medium
Metallic Transfer Foil Sheets Holographic Colors
Crafty Power Tape Dispenser 20'
Adhesive Dots Medium
Pin It!
Thanks so much for stopping by today! I hope you like these DIY gift packaging ideas as much as I do. Please take some time to visit the talented crafters who inspired me to create these projects.
Pinspiration:


These are PURE GENIUS!!! I love love love love them!!!!!!!!!
ReplyDeleteThanks so much Julie!
DeleteLove your adorable Celebrate birthday gift box, Dana! Cute music box too! Really clever and fabulous inspiration!
ReplyDeleteThanks!
Delete