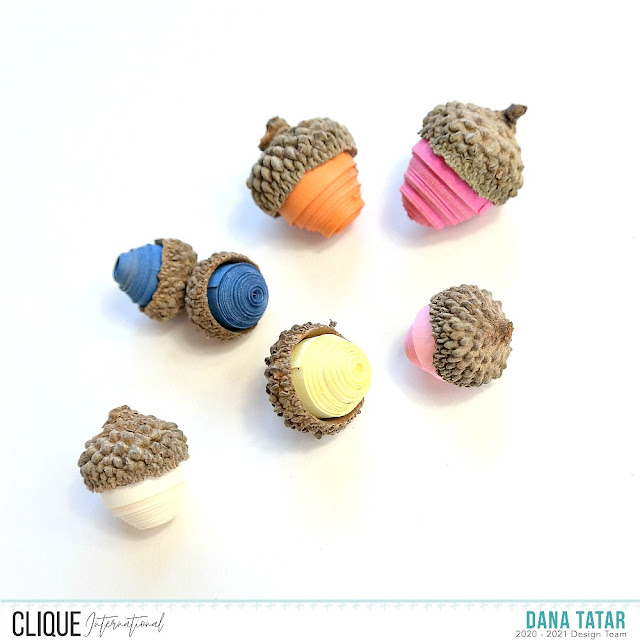
Hi! I'm sharing a simple quilling tutorial for Clique International today. I've been experimenting with quilling for several months. This tutorial is fast and fun and hardly requires any tools. Turn your collection of acorn caps into colorful fall crafts by rolling quilling paper to fill the empty space. I've used these nature-inspired embellishments on handmade cards that I'm sharing in an upcoming blog post. (Scroll down to the bottom of the post for a sneak peek!)
Quilled Acorn Embellishment Tutorial
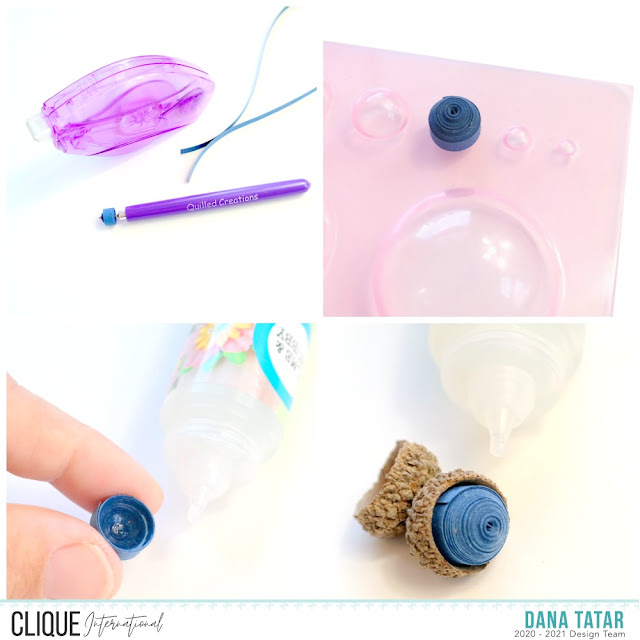
Step 1: Use the slotted quilling tool to roll strips of quilling paper into a tight coil large enough to fit inside an acorn cap. Join more than one paper strip together by using a micro adhesive runner or liquid glue.
Step 2: Use a mini mold to transform the tight coil into a 3D dome. If you don't have this tool, simple push on the center of the coil, or use the rounded end of the slotted quilling tool, to form the dome.
Step 3: Coat the inside of the paper dome with liquid glue and let dry.
Step 4: Glue the paper dome into the acorn cap.
A note about acorn caps: I purchased the acorn caps that I used for these cards. They were cleaned and dried for me. If you collect acorns from nature for use on craft projects, first clean them with soapy water and let dry. To be sure that there aren't any insects in the caps, heat them in a 175 degree oven for about 90 minutes.
These little cuties look fantastic on cards!
Explore & Learn Series: Quilling For Scrapbookers
Other Supplies: Acorn Caps; Mini Mold: Quilled Creations; Glitter: Adhesive: Scrapbook Adhesives by 3L
Pin It!


Wow wow wow! These are AMAZING!! I love them!
ReplyDeleteThanks so much Julie!
Delete