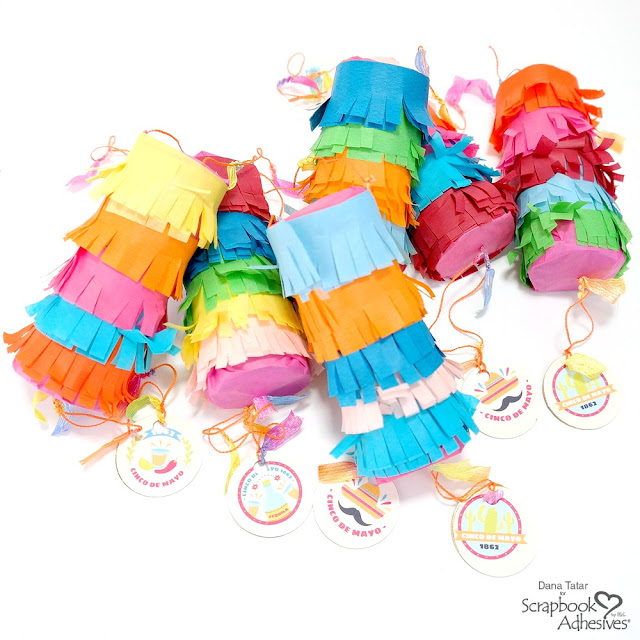
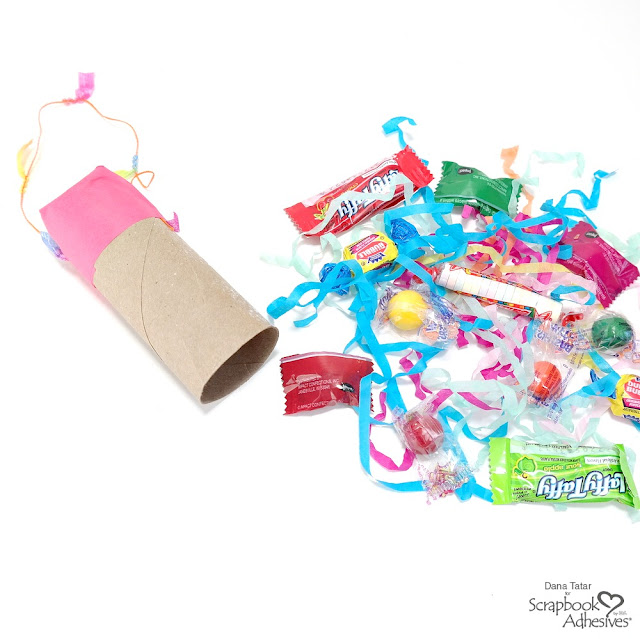
Hi! I'm sharing a fun tutorial for Scrapbook Adhesives by 3L today. I wanted to create some kid favors for the upcoming Cinco de Mayo holiday. (I'm not going to pretend that I didn't make one for myself!) I think a piñata is super fun at any age. I'll never turn down free candy, which is what I filled these with, but any small trinket or gift item could hide inside these favors.
I'm totally over a large piñata activity that requires supervision by several adults. Every time there is a piñata at a party I attend, there is a near miss, or direct hit, of another child with the piñata stick. In addition to a strong likelihood of injury, it seems like there is always an uneven distribution of candy, which is never fun to sort out. I'm hoping to avoid all the drama by handing out these cute personal piñatas that hold identical contents. I had a great time creating this project with inexpensive and upcycled craft supplies. I put the money I saved on a store-bought piñata to much better use...party grub.
How to Create Personal Piñatas from Empty Paper Rolls
Supplies:
Empty Toilet Paper/Paper Towel Rolls
Colorful Tissue Paper
Chipboard Tags
Freepik Cinco de Mayo Sticker Download
White Cardstock
White Cardstock
Festive Ribbon
Multicolor Paper Shred
Candy
Scissors
Hole Punch
Needle
Needle
Ruler
Step One: To seal the top end of one paper tube, cut a piece of tissue paper to measure approximately 4 by 4 inches. Use scissors to cut 1-inch slits on a diagonal from each corner to the center of the square. These cuts will help the tissue paper to fold around the tube flatly. Apply a 5-inch piece of Crafty Power tape about 1/2 inch down from the top of the tube. Peel away the white liner, lay the tissue paper over the top of the tube, and press down only two flaps of tissue paper on opposite sides of the tube to cover the tape. All exposed tape should be covered by these two flaps of tissue paper. Apply a second 5-inch piece of Crafty Power Tape around the top of the tube. Cut a length of decorative ribbon to measure 12 inches. Peel the white liner from the tape and secure the ends of the ribbon on either side of the tube to make a loop. Fold down the remaining two tissue paper flaps to cover the rest of the exposed tape.
Step Two: Fill the tube with colorful paper shred and small candy.
Step Three: Create a pull string for the bottom of each piñata. Print the FREE Cinco de Mayo Stickers from Freepik onto white cardstock. Cut the stickers out and attach them to chipboard tags using Large Adhesive Dots. Punch a hole in the top of each tag and loop a 12-inch piece of decorative ribbon through the opening.
Step Four: To seal the bottom end of one piñata, cut a piece of tissue paper to measure approximately 4 by 4 inches. Use scissors to cut 1-inch slits on a diagonal from each corner to the center of the square. Use a needle to thread the ends of the pull string through the center of the tissue paper square. Remove the needle and tie the ends of the pull strings into a knot. Apply a 5-inch piece of Crafty Power tape about 1/2 inch up from the bottom of the tube. Peel away the white liner, lay the tissue paper over the top of the tube, and press down only two flaps of tissue paper on opposite sides of the tube to cover the tape. All exposed tape should be covered by these two flaps of tissue paper. Apply a second 5-inch piece of Crafty Power Tape around the bottom of the tube. Peel the white liner from the tape fold down the remaining two tissue paper flaps to cover the exposed tape.
The above photo shows how the candy-filled piñata should look once both ends are sealed.
Step Five: Cut five different colors of tissue paper into 2x12 inch strips. Fold each strip in half. Use scissors to make cuts along the open end of each piece of tissue paper to create a fringed edge.
Step Six: Use Crafty Power Tape to secure the end of a strip of fringed tissue paper just above the bottom edge of the tube. Peel the white liner from the tape and wrap the fringed tissue paper around the tube. Secure the end of the fringed tissue paper with another piece of Crafty Power Tape. Continue wrapping the other fringed tissue paper strips up the tube until covered.
Pass out and enjoy! Simply pull down on the tag to break through the tissue paper bottom to release the contents.
Thanks for stopping by today! These favors are sure to add fun to your next fiesta! I'm planning to use these favors for Cinco de Mayo, but they are great for celebrations year-round. This design is easy to personalize for any occasion by simply changing the color of tissue paper and the decorations on the pull tags.
If you need some recipe ideas, I created a mini album to hold my favorite Cinco de Mayo recipes. You can read more about that project and get the link to my favorite recipes HERE.
Pin It!


These are sooooooooooooooo clever!! I love love love love love them!!!!!
ReplyDelete